Are you tired of watching your pool or pond water levels drop mysteriously? Don’t let leaks drain your patience or your wallet! This comprehensive guide will walk you through the process of fixing leaks in your pool or pond plumbing using PipeFuze, an innovative solution from PipeFuze. Learn how to save water, time, and money by tackling leaks head-on with our step-by-step instructions.
What Causes Leaks in Pool and Pond Plumbing?
Leaks in pool and pond plumbing can occur due to various factors:
- Age-related wear and tear
- Freeze-thaw cycles
- Ground shifting
- Improper installation
- Accidental damage
Understanding the root cause can help prevent future leaks and ensure a long-lasting repair.
Why Choose PipeFuze for Leak Repair?
PipeFuze offers several advantages over traditional leak repair methods:
- Non-invasive solution
- No need to dig up your deck or landscaping
- Cost-effective compared to pipe replacement
- Quick and efficient repair process
- Long-lasting results
The Homeowner Kit from PipeFuze is the perfect solution to repair plumbing (suction or pressure side) lines without having to cut the concrete, and asphalt or dig up the line.
What Equipment Do You Need for PipeFuze Application?
Before starting the repair, gather the following:
- PipeFuze Part A and Part B
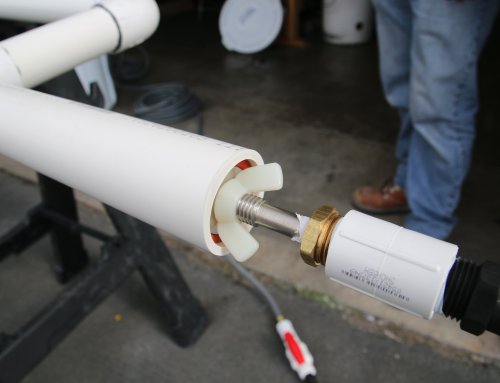
- Pipe Injector
- Return rig
- Mixing bin
- Injector pump
- Hoses (supplied with kit)
- Pressure gauge
How Do You Prepare for PipeFuze Application?
Proper preparation is key to a successful repair:
- Perform a pressure test on the leaking line
- Bring pressure up to 10-15 lbs (lower end for smaller diameter pipes, upper end for larger pipes)
- If pressure drops more than 5lbs in 30 seconds, the break may be too large for PipeFuze
- Determine the inflow and outflow of the pipe to be repaired
- Shut or plug any additional inlets or outlets if necessary
What’s the Step-by-Step Process for Applying PipeFuze?
Follow these steps carefully:
- Insert the Pipe Injector into the inflow side of the line
- Insert the return rig at the outflow side of the line
- Set the mixing bin on a flat surface between the injection rig and return rig
- Fill the mixing bin halfway with water
- Set up the injector pump and connect hoses
- Check for kinks in the hoses and prime the system
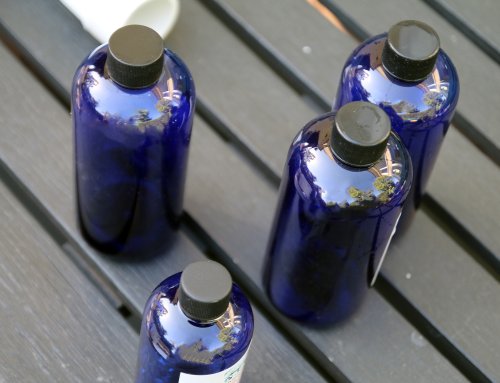
- Shake Part A vigorously for no less than 1 minute
- Pour entire contents of Part A into the bin
- Run the system for approximately 2 hours, monitoring water loss
- If major water loss occurs, add another bottle of Part A and repeat
- Shake Part B vigorously for no less than 1 minute
- Pour entire contents of Part B into the mixing bin
- Run the system continuously for 2-3 hours (3 hours for best results)
- Disconnect equipment and clean thoroughly with water
- Pressure test and return the line to service
How Long Does the PipeFuze Repair Process Take?
The entire process typically takes 4-6 hours, depending on the severity of the leak. This is significantly faster than traditional repair methods, which can take days or even weeks.
Can PipeFuze Fix All Types of Leaks?
While PipeFuze is highly effective, it has limitations:
- Best for leaks causing up to 5lb pressure drop in 30 seconds
- May not be suitable for extremely large breaks that would require deck cutting
- Works on various pipe materials, including PVC and metal
What Precautions Should Plumbers Take When Using PipeFuze?
Safety first! Remember these tips:
- Wear protective gear (gloves, goggles)
- Work in a well-ventilated area
- Follow mixing instructions carefully
- Keep children and pets away from the work area
- Ensure there are no kinks in the hoses
How Can You Troubleshoot During the PipeFuze Application?
If you encounter issues during the process:
- For major water loss, add another bottle of Part A and refill the bin halfway
- Repeat the process while monitoring the level
- Ensure all connections are secure and leak-free
- Check for proper pressure throughout the system
Why is it Important to Fix the Leak ASAP?
Water leaks can be a homeowner’s nightmare, causing significant damage and wasting gallons of water if left unchecked. A leaky pipe or fixture may seem minor at first, but it can quickly escalate into a major problem that needs to replace entire sections of your plumbing system. Finding and fixing leaks promptly is crucial to prevent water damage and conserve your water supply. Leaks in your home can occur anywhere, from faucets and toilets to hidden pipes behind walls. If you’re unsure how to address a leaking pipe or suspect you need to replace some of your plumbing, it’s best to consult a professional plumber. They can help you locate and repair leaks efficiently, saving you money on water bills and preventing potential disasters in your home. If you think you may have a leak, check out our products and save water and money later.
Key Takeaways for Fixing Leaks with PipeFuze
- PipeFuze offers a non-invasive, cost-effective solution for pool and pond plumbing leaks
- Proper preparation and following instructions are crucial for successful repair
- The process typically takes 4-6 hours to complete
- Vigorous shaking of both Part A and Part B for at least 1 minute is essential
- Monitor water levels during the process and be prepared to add more Part A if needed
By choosing PipeFuze from PipeFuze, you’re opting for a smart, efficient way to fix leaks and keep your pool or pond in top condition. Don’t let leaks drain your resources – take control with PipeFuze! Contact us today to learn more!

